You've specified the perfect LED strip. The CRI is high. The colour temperature is right. The power supply is correctly sized. The installation team arrives on site – and within hours, you start getting calls. Sections of the strip are flickering. Some segments are completely dead. Others work intermittently. The culprit? Poor connections. In commercial LED strip projects, connections are the single most common point of failure. A hotel corridor with 50 connection points. A retail display with custom corners and branches. A façade installation with hundreds of joints. Every connection is a potential failure point.
This guide examines the two primary connection methods – soldering and solderless connectors – and provides selection criteria for specifiers, contractors, and facility managers.
The Scale of the Problem
Commercial LED strip installations involve far more connections than most specifiers realise. Consider a typical hotel guest floor corridor:
· 10 metres of continuous strip = approximately 1 connection (power feed)
· Multiple strips joined end-to-end = 1 connection per 5-metre segment
· Corners, T-junctions, and branches = additional connections
· Power injection points = 1 connection per injection
A single corridor can easily have 10-15 connections. A full hotel floor might have 50+. A large retail fit-out could have hundreds.
Each connection is a potential failure point – and in commercial environments, failures mean service calls, unhappy clients, and reputational damage.
Method 1: Soldering – The Professional Standard
How it works: Soldering involves melting solder (a metal alloy) onto the copper pads of the LED strip and the connecting wire, creating a permanent electrical and mechanical bond.
Why it's the gold standard: Soldering creates a permanent, low-resistance connection that won't fail from vibration, temperature changes, or physical movement. For permanent installations where reliability is paramount, soldering is the preferred method.
Advantages:
· Most reliable – Creates the strongest mechanical and electrical bond
· Lowest resistance – Minimal voltage drop across the joint
· Waterproof capable – Can be sealed with heat shrink or silicone
· Compact – No bulky connectors taking up space
Disadvantages:
· Time-consuming – Requires skill and practice
· Skill-dependent – Poor soldering creates "dry joints" that fail
· Difficult in tight spaces – Hard to access in recessed installations
· Not field-modifiable – Changes require re-soldering
Best for: Permanent commercial installations, outdoor/waterproof applications, high-vibration environments, and projects where reliability is critical.
Method 2: Solderless Connectors – The Installation Efficiency Choice
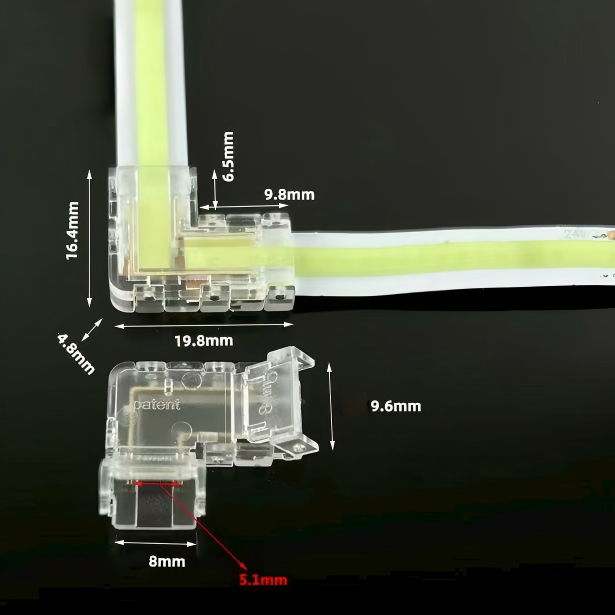
How it works: Solderless connectors use spring-loaded pins or piercing contacts that bite through the strip's silicone coating to make electrical contact with the copper pads. The strip is inserted into the connector, and a latch or clip is closed to secure it.
Why they're popular: Solderless connectors dramatically reduce installation time. A connection that takes 5-10 minutes to solder can be completed in 30 seconds with a connector. They also allow multiple installers to work simultaneously on different sections.
Advantages:
· Fast installation – Seconds per connection, not minutes
· No skill required – Anyone can install them correctly
· Field-modifiable – Easy to change or adjust during installation
· Portable – No soldering iron or power source needed
Disadvantages:
· Less reliable – Can loosen over time from vibration or thermal cycling
· Higher resistance – Piercing contacts have higher electrical resistance than solder
· Bulky – Takes up more space than a soldered joint
· Not waterproof – Most are not rated for outdoor or damp locations
· Compatibility issues – Must match strip width, pin count, and voltage
Best for: Fast-track installations, temporary setups, projects with many connections where speed is prioritised, and installations where future modifications are expected.
Commercial Project Considerations
1.For hospitality (hotels, restaurants):
Reliability is paramount. Failed connections mean guest complaints and service calls. Soldering is strongly recommended for permanent installations, especially in areas that are difficult to access after fit-out.
2.For retail (fit-outs, displays):
Speed and flexibility often matter more. Retail fit-outs are typically fast-track projects with tight deadlines. Solderless connectors allow rapid installation and easy modification during the fit-out phase. However, for permanent displays, soldering is still preferred.
3.For façade and outdoor installations:
Waterproofing is critical. Soldered connections sealed with heat shrink or silicone are the only reliable option. Most solderless connectors are not waterproof and will fail in outdoor environments.
4.For offices and commercial buildings:
A mixed approach often works best. Use soldering for permanent, hidden connections (inside ceilings, walls, or channels) and solderless connectors for accessible areas where future changes are expected.
Common Failure Modes and How to Avoid Them
Soldering failures:
· Dry joints – Solder that hasn't properly wetted the copper pad. Prevention: Use flux, proper temperature, and clean pads.
· Overheating – Melts the strip's PCB or adhesive. Prevention: Use a temperature-controlled iron (300-350°C) and work quickly.
· Insufficient solder – Creates high-resistance joints. Prevention: Use enough solder to create a fillet.
Solderless connector failures:
· Misalignment – Pins don't contact the copper pads properly. Prevention: Cut precisely on the marked cut line and align carefully.
· Loose connection – Connector opens from vibration or movement. Prevention: Use locking-type connectors and secure cables with strain relief.
· Corrosion – Moisture enters the connection point. Prevention: Use waterproof connectors for outdoor or damp locations.
Recommendations for Specifiers
1. Specify the connection method upfront.
Don't leave it to the installer's discretion. If reliability is critical, specify soldering. If speed is the priority, specify solderless connectors with clear quality requirements.
2. Require testing of all connections.
Every connection should be tested before the strip is permanently installed. This catches failures early, when they're easy to fix.
3. Consider access for maintenance.
If you're using solderless connectors, ensure they remain accessible for future inspection and tightening. If you're soldering, ensure connections are properly sealed and protected.
4. Match connectors to the strip.
Solderless connectors must match the strip's voltage (12V or 24V), width (8mm, 10mm, or 12mm), and pin count (2-pin for single-colour, 4-pin for RGB, 5-pin for RGBW).
5. Budget for the right solution.
Solderless connectors cost more per connection than solder + labour. But they save installation time. Factor both into your project budget.
Final Thoughts
The choice between soldering and solderless connectors isn't about which is "better" – it's about which is right for your project. Soldering delivers maximum reliability for permanent, critical installations. Solderless connectors deliver speed and flexibility for fast-track projects.
 Hot News
2026-07-24
2026-07-24
2026-07-24
2026-07-24
2026-07-24
2026-07-24
 EN
EN